


An Ode to Stuffing
A rather pretentious title - but stuffing (not dressing) is important! Especially since potato stuffing is probably the only truly unique recipe I have - I've done numerous searches for something similar and keep coming up with nothing ... some use coarsely mashed potatoes - but these add bread and/or apples - nothing is really quite the same as the one we have. So here is one story about how we got it:
 The Grandmothers - Great Grandma Hanley, Great Grandma Casey,
and Great Great Grandma Hughes
When she arrived in this country from Ireland in 1908, your Great Great Grandmother (in the case of James and Madeline, Great Great Great), Mary Collins Hughes, lived in an apartment in Long Island City, Queens with her husband Peter Hughes ( a poor stonecutter), and their six children. According to your Great Great Aunt Nellie (one of her daughters), a German lady lived next door. This long forgotten neighbor helped your Great Great Grandmother out when she first emigrated and taught her to make potato stuffing - making it not an Irish recipe at all! At any rate - this recipe has been served at hundreds of our family's Thanksgiving, Christmas and Easter dinners for almost 100 years and to six generations. It should serve to remind you of whence you came and to be thankful someone was kind enough to help us when we first arrived here ...
Having one's own personal Irish/German Thanksgiving story (as opposed to the impersonal, we-weren't-even-here-then Indian/British Thanksging story) is a great responsibility! Sooo - even if you hate it - you need to prepare this potato stuffing - and if you make it for enough years - you will probably learn to like & eat it - but regardless - Tradition is Tradition - make it anyway!
This is one of those faintly vague recipes - so feel free to vary the ingredient amounts a bit -
4 or 5 white potatoes (this means not russet - you want waxy potatoes that will hold together - like those in potato salad - actually Yukon Gold or red will work too)
1 stick of butter
Pepper
Salt
Thyme
Onions
2 Stalks of celery
Sage
These amounts should produce enough stuffing to fill the neck end of a 20-something pound turkey.
Start to make the stuffing the day before you are going to cook the turkey. Don't peel the potatoes, just wash them. Boil them in salted water until you can stick a fork through them easily. Then put in the fridge until the next morning.
First thing in the morning, peel the potatoes, then cut into small cubes. Chop the celery and onions fairly fine. Melt the butter in a large frying pan and add the chopped celery and onions. Cook over fairly low heat until the onions are transparent & when you stick your head over the pan your eyes don't water - about 10 minutes. Add the potatoes - if it seems too dry add some more butter - up to a whole stick - Thanksgiving is no time to worry about your diet! {But do it a bit at a time - one year Nana added about a pound of butter and the potatoes were floating} Add the salt and pepper - you'll have to taste - but prolly less salt than you think and lots more pepper. Add the thyme - lots of thyme! ( I wonder if thyme has some important medicinal qualitites - I hope so - I seem to use it in everything in quite large quantities) ok, probably up to 1 tablespoon ... the other herbs are optional.
When it's all mixed well, stuff the turkey. It's best to stuff with the potato stuffing first - with the turkey upside down - then turn it over and stuff the rear with the bread stuffing. If you do it the other way round - you risk having everything drop out (Believe me, I know).
Do Not Leave the Turkey Sit Around Stuffed!
{Unless of course you have the flu and don't intend to eat and therefore hope to be the sole surving heir ... hmmm ... while writing the first edition this seemed like a poor option ... though the pay off would be better now - it's still a pretty bad idea}
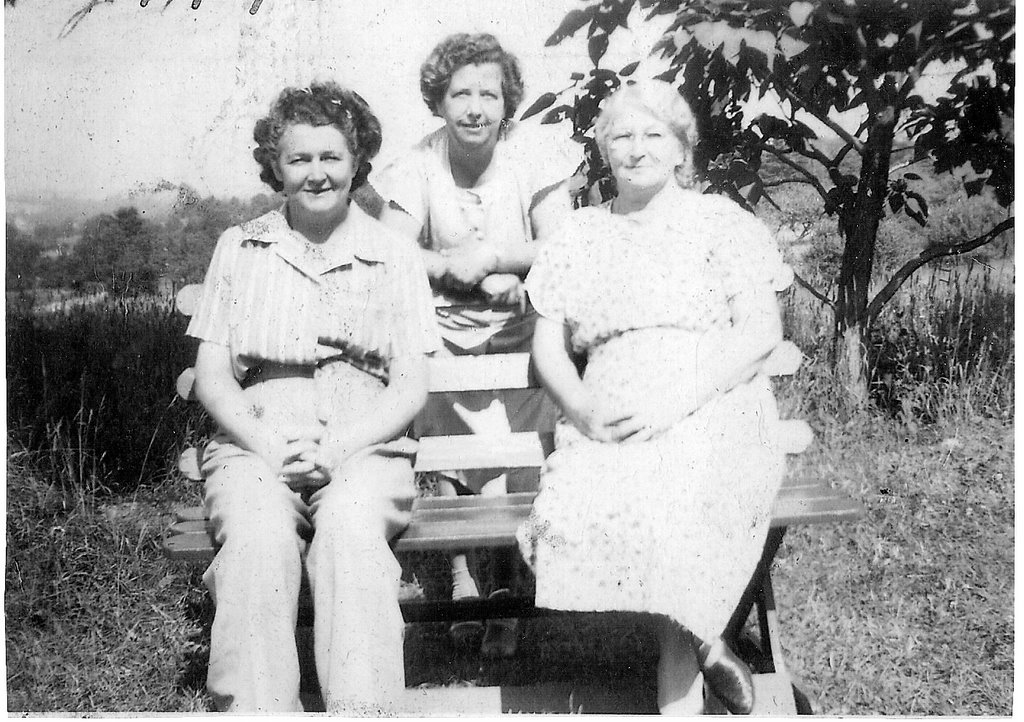 The Grandmothers - Great Grandma Hanley, Great Grandma Casey,
and Great Great Grandma Hughes
When she arrived in this country from Ireland in 1908, your Great Great Grandmother (in the case of James and Madeline, Great Great Great), Mary Collins Hughes, lived in an apartment in Long Island City, Queens with her husband Peter Hughes ( a poor stonecutter), and their six children. According to your Great Great Aunt Nellie (one of her daughters), a German lady lived next door. This long forgotten neighbor helped your Great Great Grandmother out when she first emigrated and taught her to make potato stuffing - making it not an Irish recipe at all! At any rate - this recipe has been served at hundreds of our family's Thanksgiving, Christmas and Easter dinners for almost 100 years and to six generations. It should serve to remind you of whence you came and to be thankful someone was kind enough to help us when we first arrived here ...
Having one's own personal Irish/German Thanksgiving story (as opposed to the impersonal, we-weren't-even-here-then Indian/British Thanksging story) is a great responsibility! Sooo - even if you hate it - you need to prepare this potato stuffing - and if you make it for enough years - you will probably learn to like & eat it - but regardless - Tradition is Tradition - make it anyway!
This is one of those faintly vague recipes - so feel free to vary the ingredient amounts a bit -
4 or 5 white potatoes (this means not russet - you want waxy potatoes that will hold together - like those in potato salad - actually Yukon Gold or red will work too)
1 stick of butter
Pepper
Salt
Thyme
Onions
2 Stalks of celery
Sage
These amounts should produce enough stuffing to fill the neck end of a 20-something pound turkey.
Start to make the stuffing the day before you are going to cook the turkey. Don't peel the potatoes, just wash them. Boil them in salted water until you can stick a fork through them easily. Then put in the fridge until the next morning.
First thing in the morning, peel the potatoes, then cut into small cubes. Chop the celery and onions fairly fine. Melt the butter in a large frying pan and add the chopped celery and onions. Cook over fairly low heat until the onions are transparent & when you stick your head over the pan your eyes don't water - about 10 minutes. Add the potatoes - if it seems too dry add some more butter - up to a whole stick - Thanksgiving is no time to worry about your diet! {But do it a bit at a time - one year Nana added about a pound of butter and the potatoes were floating} Add the salt and pepper - you'll have to taste - but prolly less salt than you think and lots more pepper. Add the thyme - lots of thyme! ( I wonder if thyme has some important medicinal qualitites - I hope so - I seem to use it in everything in quite large quantities) ok, probably up to 1 tablespoon ... the other herbs are optional.
When it's all mixed well, stuff the turkey. It's best to stuff with the potato stuffing first - with the turkey upside down - then turn it over and stuff the rear with the bread stuffing. If you do it the other way round - you risk having everything drop out (Believe me, I know).
Do Not Leave the Turkey Sit Around Stuffed!
{Unless of course you have the flu and don't intend to eat and therefore hope to be the sole surving heir ... hmmm ... while writing the first edition this seemed like a poor option ... though the pay off would be better now - it's still a pretty bad idea}
Labels: Thanksgivng
posted by Silverthyme | 7:13 AM
|
0 comments

